Razor Ecosmart Metro Electric Scooter: Features and Specs
Did you know micro-mobility options prevent over 1.5 million tons of CO2 emissions annually in the U.S.? This shift toward eco-friendly commuting has reshaped urban travel, and the Razor Ecosmart Metro Electric Scooter stands at the forefront of this movement.
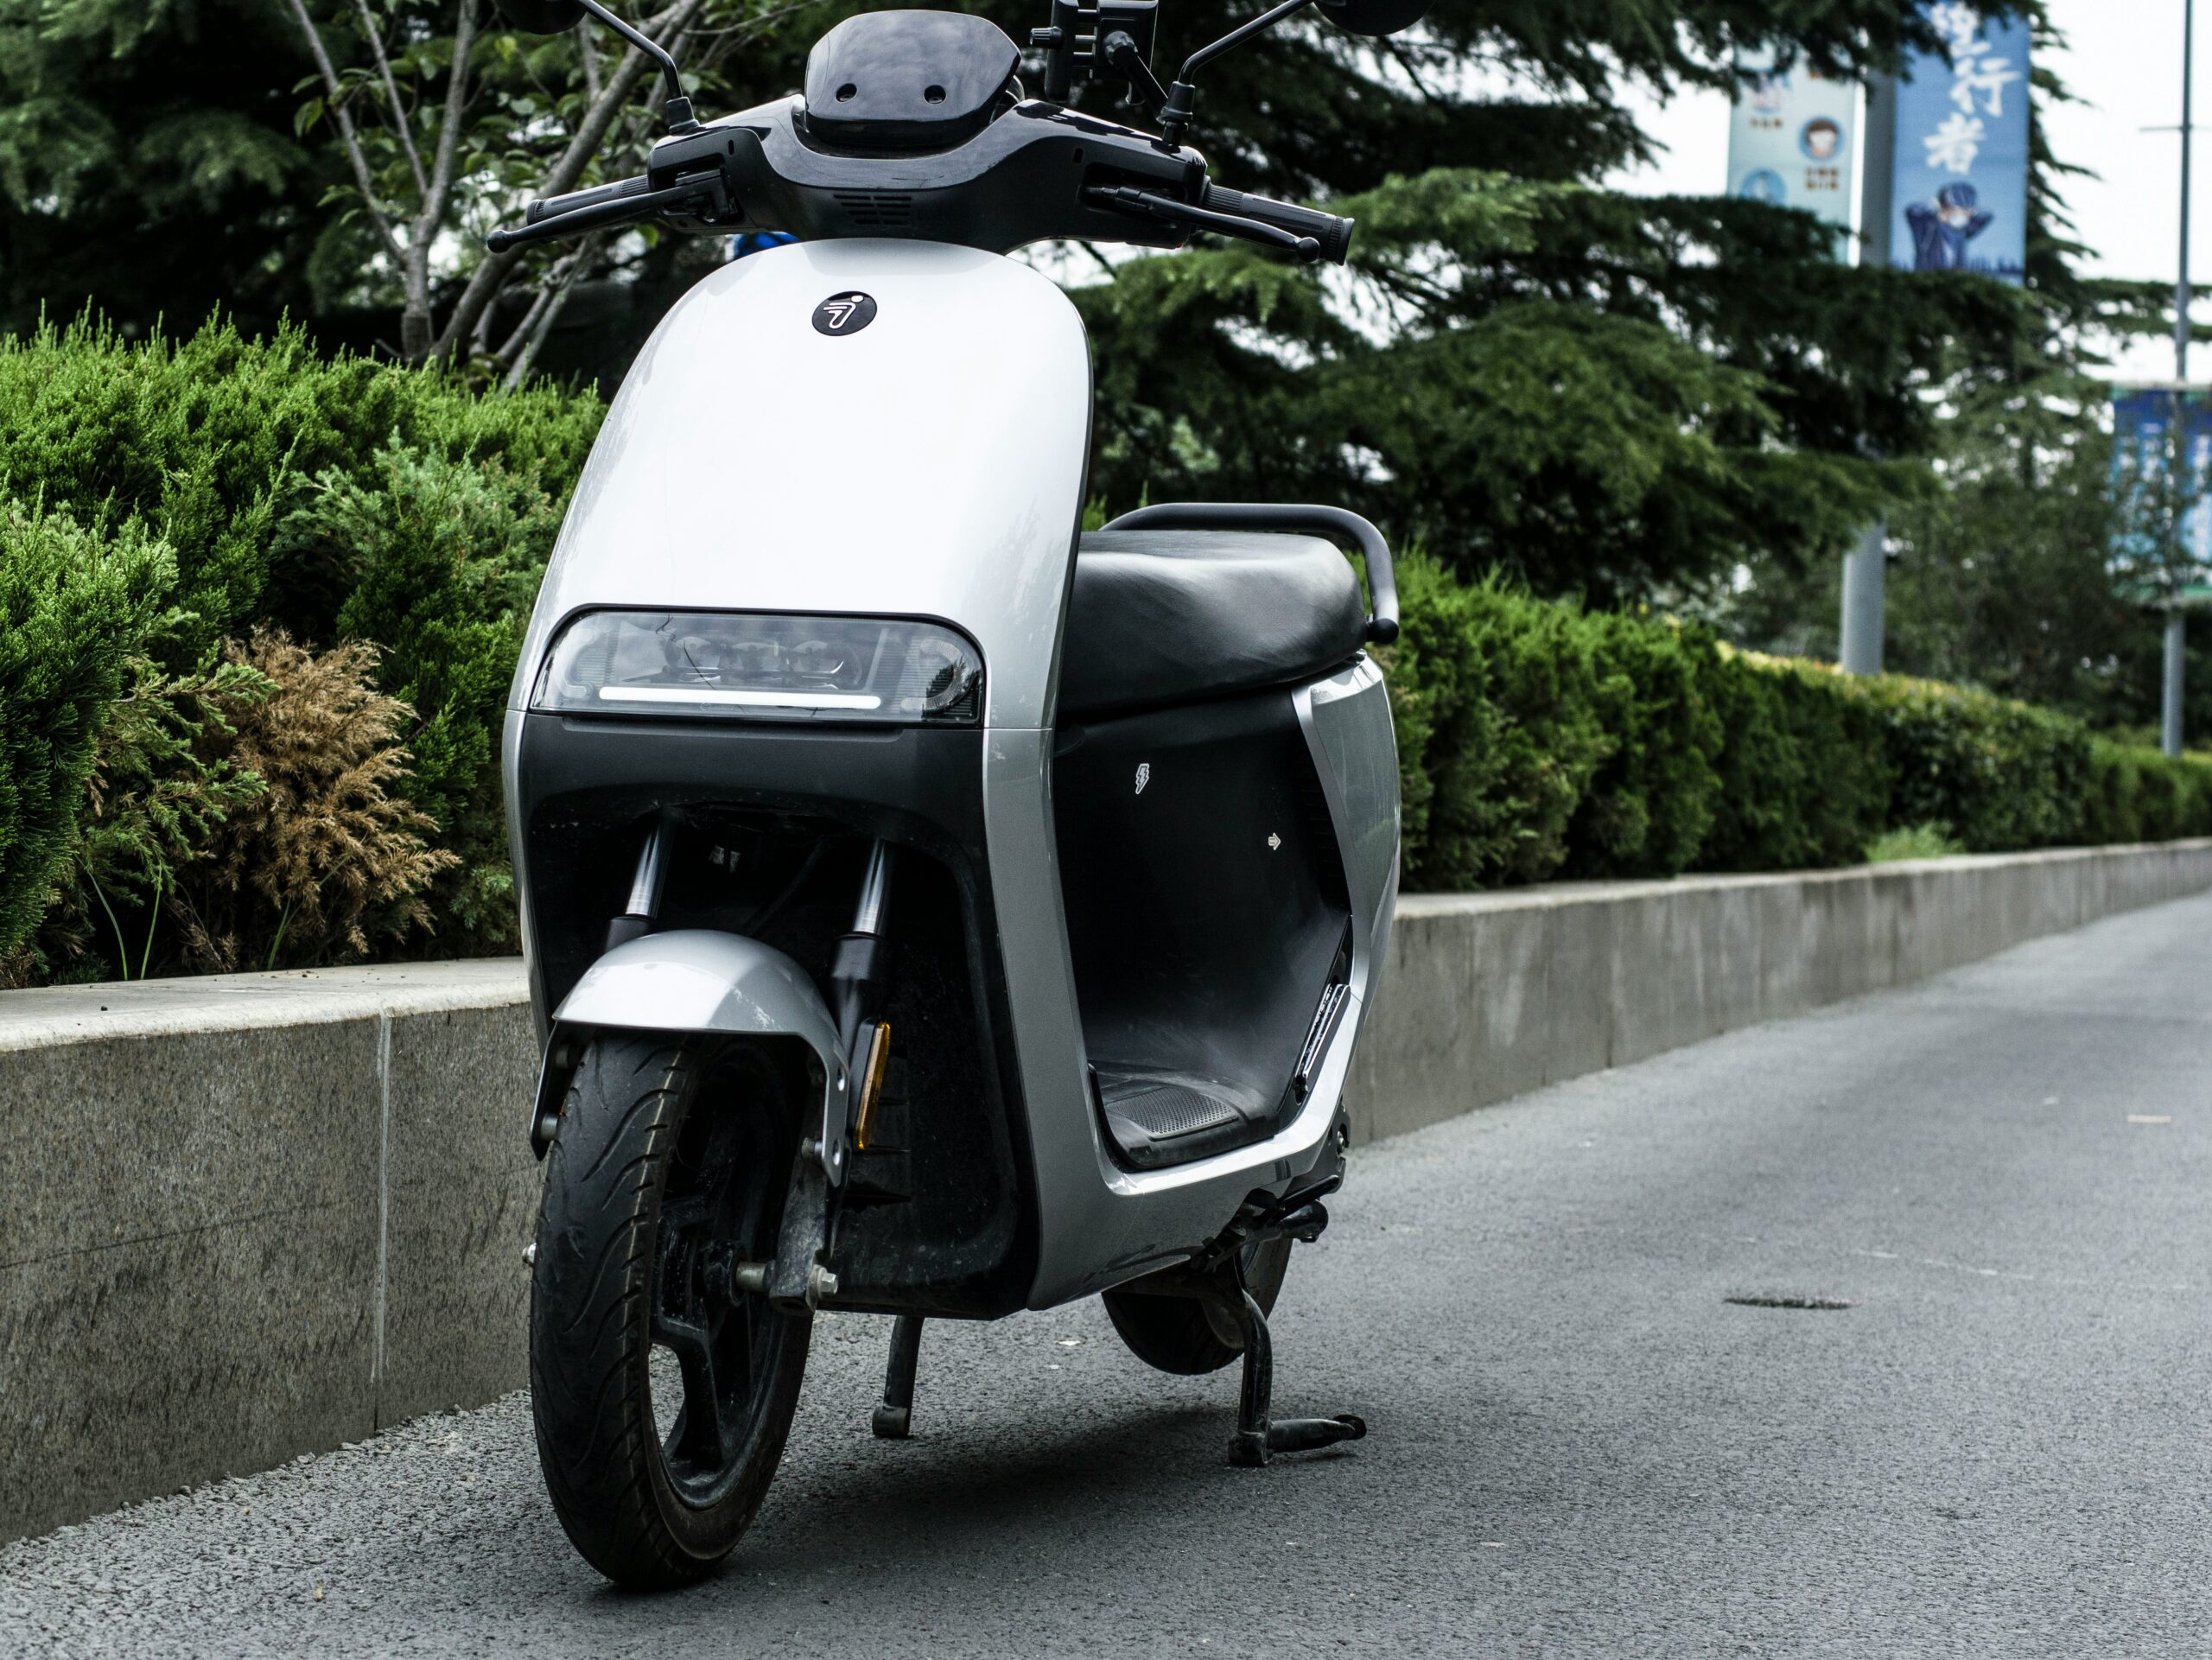
Designed for everyday use, this two-wheeled vehicle merges practicality with modern aesthetics. Its sleek frame and ergonomic handlebars cater to riders prioritizing both comfort and style. Whether navigating crowded streets or cruising through neighborhoods, it delivers smooth acceleration and steady handling.
Perfect for casual riders and daily commuters alike, the Ecosmart Metro balances durability with lightweight portability. The deck supports riders up to 220 pounds, while the quiet motor ensures minimal noise pollution. Foldable features make it easy to store, ideal for mixed-mode travel with buses or trains.
This guide breaks down everything from battery life to braking systems. Let’s explore what makes this model a standout choice for eco-conscious urbanites.
Introduction to the Razor Ecosmart Metro Electric Scooter
Modern cities demand smarter transportation solutions. The Razor Ecosmart Metro answers this call with a streamlined design built for efficiency. Clean lines and a compact frame prioritize both aesthetics and functionality, making it ideal for navigating tight urban spaces.
Overview of the Scooter’s Design and Purpose
At its core, the model relies on an original battery pack paired with a controller lithium battery. This combination ensures consistent power delivery while maintaining energy efficiency. Riders enjoy a top speed of 15 mph, balancing safety with quick commutes.
The battery pack supports up to 40 minutes of continuous use. Its lightweight construction doesn’t sacrifice durability, even on uneven sidewalks. Foldable handlebars and a collapsible stem enhance portability for mixed-mode travel.
Target Audience and Riding Context
This vehicle suits students, urban professionals, and eco-conscious riders. Short trips across campuses or downtown areas highlight its strengths. Smooth acceleration handles stop-and-go traffic effortlessly.
Tech enthusiasts appreciate the seamless integration of its controller lithium battery system. Whether zipping through bike lanes or storing it under a desk, the design adapts to modern lifestyles. Upcoming sections will explore how these features translate to real-world performance.
Exploring the Razor Ecosmart Metro Electric Scooter Features
Behind every smooth ride lies a blend of smart engineering and user-focused design. This model’s 250-watt motor provides zippy acceleration, tackling inclines up to 10% gradients without strain. Riders enjoy a top speed of 15 mph, ideal for keeping pace with city traffic while maintaining control.
Detailed Look at Key Features
The motor’s efficiency shines during stop-and-go commutes, delivering instant torque for quick starts. A built-in battery management system pairs with the included charger to optimize energy use. This duo ensures cells charge evenly, extending the battery pack’s lifespan.

Safety meets convenience with the twist-grip throttle and rear brake. The top speed adapts to rider input, preventing sudden surges. Commuters appreciate the 40-minute runtime, which covers most short trips before needing a recharge.
Specs that Matter for Everyday Use
Weighing 46 pounds, the frame supports riders without feeling bulky. The battery pack stores 24V of power, balancing capacity and weight. Its 6-hour full charge time fits easily into evening routines.
Key numbers for daily riders:
- Motor: 250W brushless hub
- Range: 10 miles per charge
- Max Load: 220 lbs
These specs make it a practical choice for errands or quick commutes. The battery charger’s LED indicators simplify monitoring, while the pack’s rugged casing resists weather splashes.
Evaluating Battery Performance and Upgrades
Battery choices can make or break your ride experience. While the original setup works well for casual use, upgrades unlock new levels of efficiency. Let’s compare options and explore why modern cells outperform older designs.
Original Battery Pack vs. Upgraded Options
The standard battery pack delivers 24 volts, suitable for short commutes. However, its lead-acid cells weigh more and lose power faster during cold weather. Upgraded lithium alternatives maintain steadier voltage, even at 80% discharge.

Online forums note lead-acid packs often hit low voltage cutoffs around 21V, triggering shutdowns. Lithium systems stay above 24V longer, extending range. Swapping also reduces weight by 30%, freeing power for speed or hills.
Understanding Lithium Battery Benefits
Lithium cells offer three clear advantages: longer lifespan, faster charging, and stable volts. They handle 1,000+ cycles versus 300 for lead-acid. A 36V upgrade paired with a compatible charger cuts refueling time by half.
Key technical differences:
- Discharge Rate: Lithium provides 20A continuous vs. 15A for lead-acid
- Voltage Sag: Drops just 1.2V under load compared to 3V
- Energy Density: Stores 150Wh/kg versus 35Wh/kg
These traits ensure consistent power delivery, especially when paired with a controller lithium-optimized system. Always match battery chemistry with your charger—mismatches can damage cells or limit the amount of energy transferred.
Battery Management and Controller Integration
Think of your ride’s power system as a well-coordinated team. The battery, controller, and wiring work together to deliver smooth performance while keeping you safe. Let’s break down how these components interact behind the scenes.

Role of the Battery Management System (BMS)
The BMS acts like a guardian for your power source. It constantly monitors cell voltage, temperature, and current flow. If things get too hot or energy levels drop dangerously low, it steps in to prevent damage.
This smart system balances charge across individual cells in the battery pack. It also triggers automatic shutdowns when current exceeds safe limits—say, during steep climbs. This protection extends the lifespan of your batteries by up to 30% compared to unmanaged systems.
How the Controller Operates with Different Battery Types
Your controller is the translator between the throttle and motor. It adjusts power delivery based on the connected battery type. Lithium packs communicate voltage ranges clearly, allowing precise speed control. Older lead-acid models require more guesswork.
Proper wiring ensures energy moves efficiently from source to motor. Thick gauge cables prevent voltage drops during acceleration. For example, 12AWG wires handle 20-amp loads better than thinner 16AWG alternatives, reducing heat buildup.
Key interactions to remember:
- BMS safeguards against overcharging
- Controller interprets battery signals for smooth acceleration
- Upgraded batteries require compatible controllers
Motor Performance and Speed Optimization
Unlocking peak performance starts with understanding your ride’s heart: the motor. The 250-watt motor balances energy efficiency with responsive acceleration, making it ideal for urban commutes. Let’s explore how to maximize its potential while keeping your ride safe and smooth.

Insights on the Watt Motor and Top Speed
The motor’s design prioritizes reliability over raw power. It delivers a factory-set top speed of 15 mph, perfect for navigating bike lanes or crowded sidewalks. However, external factors like rider weight or tire pressure can reduce this by 1-2 mph.
Upgrading to a 36V battery often boosts speed by 3-5 mph. But pushing beyond 20 mph risks overheating the motor. A well-maintained system maintains consistent performance across 10-12 mile ranges.
Effects of Overvolting and Throttle Adjustments
Overvolting—using higher-voltage batteries—can strain components. While a 36V setup increases speed, it also raises motor temperatures by 15-20%. Pairing it with a heat-resistant controller prevents premature wear.
Throttle adjustments offer safer optimization. Gentle, gradual input prevents sudden power surges. For example:
- Partial twists: Conserve energy on flat terrain
- Full engagement: Best for short bursts up hills
These tweaks help riders adapt to traffic without compromising motor longevity. Always monitor battery levels during high-speed runs to avoid voltage drops.
Proper Charging Techniques and Battery Care
Ever wondered why some batteries lose their spark too soon? Proper care starts with smart charging habits. A well-maintained battery pack can double its lifespan, saving money and reducing waste.

Recommendations for Battery Chargers and Charging Cycles
Always use the manufacturer-approved battery charger. Generic models might deliver incorrect amp levels, causing uneven charging. For 12v systems, stick to chargers with 2-3 amp outputs—higher currents strain lead-based cells.
Tech forums highlight two golden rules: avoid draining below 20% and unplug once fully charged. Lithium setups handle partial top-ups better than lead batteries, which prefer full discharge cycles. Charging overnight? Use a timer to prevent overcharging.
Key differences between battery types:
- Lead-acid: Charge immediately after use to prevent sulfation
- Lithium: Store at 50% charge for long-term health
- All types: Keep terminals clean to maintain 12v stability
Cold weather demands extra care. Store battery packs indoors during winter—temperatures below freezing can permanently reduce capacity. With these tips, your power source stays reliable through hundreds of charging cycles.
Wiring and Electrical Configuration Considerations
Safe electrical setups form the backbone of reliable rides. Proper wiring ensures energy flows smoothly from the battery to every component. A single loose connection or misplaced switch can lead to performance hiccups or safety risks.
Guidelines for Safe Scooter Wiring
Start by disconnecting the pack before any modifications. Use color-coded wires to avoid mix-ups—red for positive, black for negative. Secure connections with heat-shrink tubing instead of tape for better insulation.
Place the power switch within easy reach but away from moving parts. Even a 0.5volt drop across corroded terminals can reduce speed. Check connections monthly with a multimeter to spot issues early.
Common troubleshooting questions include:
- Why does the motor stutter during acceleration? (Check for frayed wires near the throttle)
- How to fix flickering lights? (Test ground connections first)
Always match the battery configuration to the controller’s voltage range. A 24V system paired with a 36V pack risks overheating. Follow these steps, and your ride stays efficient and safe for years.
Upgrading and Modifying Your Razor Ecosmart Metro Electric Scooter
Looking to push your ride beyond factory settings? Thoughtful modifications can unlock hidden potential while keeping reliability intact. From speed tweaks to durability boosts, the right changes let riders tailor their experience without compromising safety.
Exploring Modifications for Enhanced Performance
Popular upgrades focus on three areas: power delivery, gearing, and energy storage. Swapping the stock throttle for a variable-speed model allows finer control over acceleration. Many forum users praise this modification for smoother starts in traffic.
Changing the sprocket and adjusting the tooth count reshapes torque output. A larger rear sprocket (like 48 teeth) improves hill-climbing, while smaller ones boost top speed. One rider reported a 12% speed increase after pairing a 36V battery with a 40-tooth setup.
Tips on Safely Upgrading Components
Always match new parts to your vehicle’s limits. For example:
- Test upgraded sprocket chains in low-traffic areas first
- Use heat-resistant connectors when rewiring
- Check battery dimensions before swapping cells
Forum threads highlight risks like motor strain from overvolting. One user shared how a mismatched charger fried their controller. Start with small changes, then monitor temperatures and voltage during test rides.
Remember: every upgrade affects the whole system. Research thoroughly, and prioritize modifications that align with your riding style. With careful planning, you can refresh your ride’s performance while keeping it street-ready.
Maintenance Strategies for Longevity
Regular upkeep keeps rides smooth and reliable over the years. Simple habits preserve capacity and prevent costly repairs. Follow these community-approved steps to maximize your vehicle’s lifespan.
- Clean the battery pack terminals monthly to prevent corrosion
- Store in dry areas to shield components from moisture
- Check tire pressure every 50 miles for optimal traction
- Tighten bolts and fasteners during seasonal changes
Preserve capacity by charging after each use, even for short trips. Always use the manufacturer’s charger—third-party models may overheat cells. Forum users report 20% longer time between replacements with proper care.
Schedule inspections based on usage. Riders covering 30+ miles weekly should check the motor monthly. For casual use, bi-monthly tune-ups suffice. Listen for unusual sounds during acceleration, which signal bearing wear.
Test brake responsiveness and lubricate moving parts every 3 months. Wipe down the battery pack to avoid dirt buildup. A well-maintained motor retains 90% of its capacity after 500 charge cycles.
Thanks for sticking with these tips! Consistent care ensures years of dependable rides. Remember: the right charger and timely checks make all the difference.
Troubleshooting Common Electric Scooter Issues
Every rider encounters hiccups eventually—knowing how to solve them keeps journeys smooth. Let’s tackle frequent challenges and restore your ride’s reliability.
Identifying and Resolving Battery-Related Problems
Premature shutdowns often trace back to batteries hitting low voltage cutoffs. Use a multimeter to check if cells dip below 21V under load. If so, recharge immediately or consider lithium upgrades for steadier amp delivery.
BMS activation? Test the charger’s output with a voltmeter. Output below 24V signals a faulty unit. For lead-based packs, clean corroded terminals with baking soda paste—this improves connection and reduces voltage drops.
- Check charger LED indicators for error codes
- Swap damaged wiring between the battery pack and controller
- Store units at 50% charge during long breaks
Still stuck? This common troubleshooting guide offers step-by-step diagnostics.
Handling Controller and Motor Issues
Erratic acceleration usually points to controller faults. Measure input volts—readings below 20V mean the controller isn’t receiving enough power. Tighten loose connectors or replace frayed cables.
Motor stalling on hills? Inspect the sprocket alignment and chain tension. Misaligned gears strain the 250-watt motor, triggering overheating. Lubricate moving parts and test throttle response on flat terrain first.
Quick fixes for common questions:
- Twist grip unresponsive? Reset the throttle calibration
- Strange noises from wheels? Check bearing seals for debris
- Reduced top speed? Verify tire pressure matches PSI recommendations
Remember: upgrades like lithium batteries require compatible controllers. Mismatched systems risk component failure. When in doubt, consult a certified technician.
Final Thoughts for a Confident Ride
Balancing innovation with practicality creates the ultimate riding experience. The Razor Ecosmart Metro delivers consistent power through its 250-watt motor, maintaining speeds up to 15 mph across urban terrain. Its seamless controller integration ensures stable voltage flow, while smart amp distribution prevents energy waste.
For lasting performance, prioritize regular charging cycles and battery checks. Lithium upgrades enhance capacity and voltage stability, especially during cold months. Always match controller specs when modifying components—mismatched parts strain the system.
Key metrics to remember:
- Motor: Handles 220 lbs effortlessly
- Volts: Maintains 24V output under load
- Range: 10 miles per charge
Bookmark this guide for quick troubleshooting or upgrade ideas. With proper care and mindful riding, your vehicle remains a reliable partner for years. Thanks for exploring these insights—now hit the streets with confidence!
FAQ
How does the original battery compare to upgraded lithium options?
The stock lead-acid battery provides reliable power but weighs more and offers shorter range. Upgrading to lithium batteries improves efficiency, reduces weight, and extends ride time due to higher energy density.
Can the motor handle a higher voltage battery?
The 500-watt motor can handle slight overvolting, but pushing beyond 36V risks overheating. Pairing it with a compatible controller and upgraded wiring ensures safer performance boosts without damaging components.
What charging habits extend battery lifespan?
Avoid draining the pack completely and store it at 50-80% charge when unused. Use the manufacturer-recommended charger to prevent overcharging, and balance cells periodically for lithium upgrades.
How does the controller manage different battery types?
The stock controller works with lead-acid voltages but may require adjustments for lithium packs. A battery management system (BMS) is crucial for lithium upgrades to regulate voltage spikes and protect cells.
What wiring changes are needed for performance mods?
Thicker gauge wires reduce resistance when upgrading batteries or motors. Always install fuses near the power source and secure connections with heat-shrink tubing to prevent shorts.
Can the top speed increase with a sprocket change?
Swapping to a smaller rear sprocket may boost speed slightly, but it strains the motor. For sustained gains, pair gear adjustments with a higher-capacity battery and optimized throttle response.
Why does the scooter lose power uphill?
Insufficient voltage sag under load often causes this. Upgrading to a lithium pack with higher discharge rates or adding a secondary battery in parallel improves hill-climbing torque.
Are aftermarket chargers safe for lithium batteries?
Only use chargers matching the battery’s chemistry and voltage. Lithium packs require chargers with CC/CV profiles—lead-acid chargers can overcharge them, creating fire risks.
How often should brake pads be inspected?
Check pad thickness monthly if riding daily. Worn pads reduce stopping power, especially after speed upgrades. Replace them once they’re under 1/8-inch thick for consistent braking.
What causes throttle lag after a battery swap?
Voltage mismatches between the controller and new battery often cause delays. Reprogramming the controller’s low-voltage cutoff or installing a voltage converter usually resolves this.